
[ad_1]
As a Mac person, you’re seemingly aware of Preview because the default app for viewing photographs. But this useful software provides you a straightforward option to signal paperwork, too. You can create and save a signature utilizing your trackpad, digicam, or cell system. Then, pop that signature into the doc in just some steps.
Here’s learn how to signal a PDF on Mac utilizing Preview by inserting a saved signature or creating a brand new one.
Sign a PDF on Mac utilizing Preview
If you have already got a saved signature, signing the PDF in Preview on Mac is a straightforward course of.
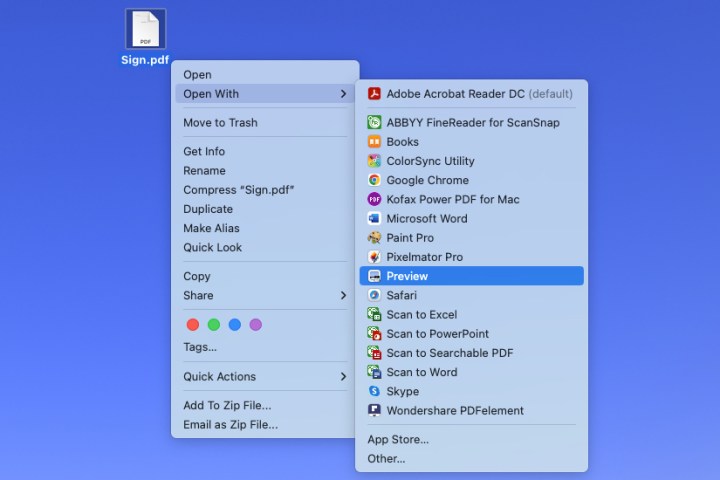
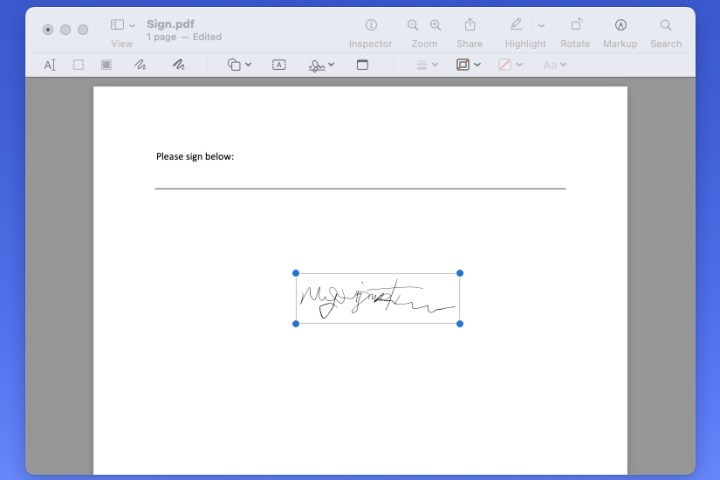
Step 1: Open the PDF file in Preview. You can do that by right-clicking the file in a folder or in your desktop, shifting to Open with, and selecting Preview from the shortcut menu.
Alternatively, if you have already got Preview open, choose File > Open and browse for the file. Choose the PDF and decide Open.
Step 2: Select Markup within the Preview toolbar on the prime. This shows a bar for the Markup instruments.
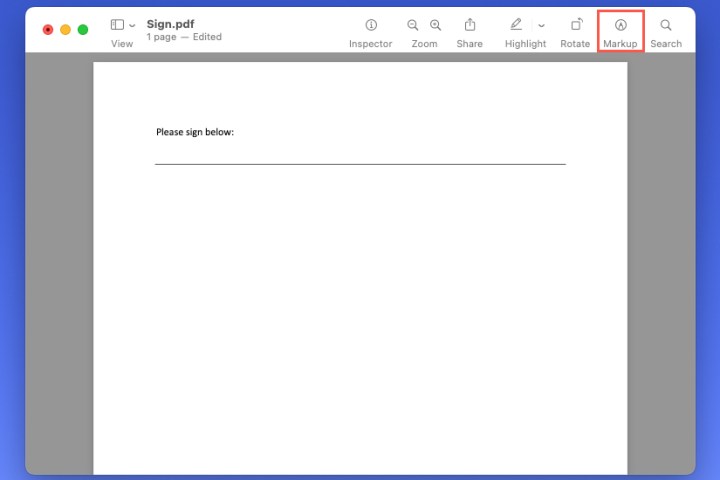
Step 3: Use the drop-down arrow subsequent to the Sign button to decide on your signature.

Step 4: When your signature shows, drag it to the spot the place you need it within the doc. You may drag a nook to resize the signature to suit the doc if wanted.
You can then save the PDF, export it, or share it utilizing File within the menu bar.

Create a signature and signal your PDF in Preview
If you don’t but have a signature, you may create one to signal your doc simply in Preview. Your new signature will mechanically save as a way to reuse it in Preview later.
Step 1: Open your PDF in Preview, and choose Markup within the toolbar.
Step 2: Use the drop-down arrow subsequent to the Sign button to decide on Create signature.

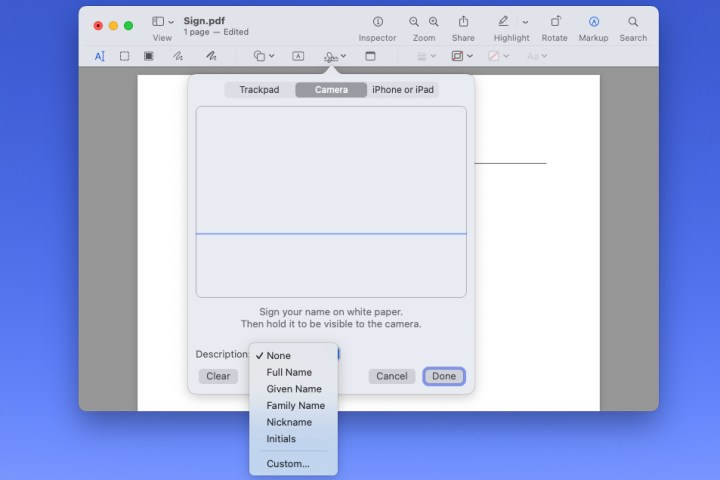
Step 3: You can then create your signature utilizing your trackpad, digicam, iPhone, or iPad. Here are the directions for every possibility:
Tackpad: Select Trackpad to signal your identify utilizing your Mac’s trackpad, and select Click right here to start. Use your finger to signal your identify on the trackpad.
Camera: Select Camera to seize a picture of your signature from a bodily paper. Use a white piece of paper and signal your identify. Then, maintain the paper as much as your digicam in order that your signature is even with the blue line on the display.
iPhone or iPad: Select iPhone or iPad > Select system within the Preview window, and decide your iPhone or iPad from the checklist. You’ll then see a display seem in your cell system prepared to your signature. Create the signature, and faucet Done.
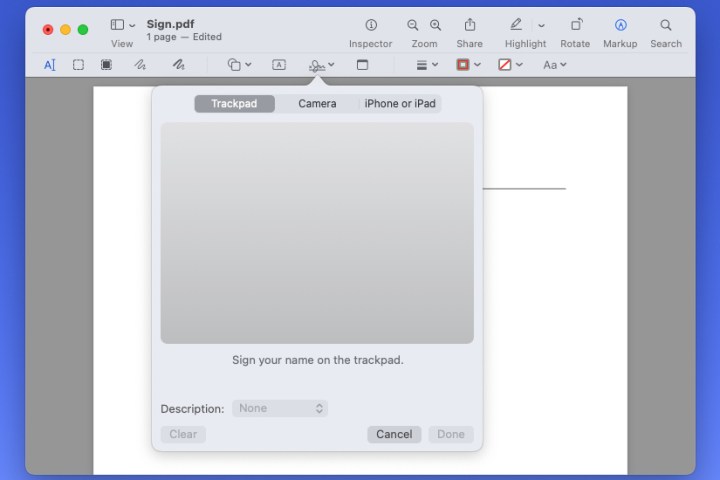
Step 4: With every of the above strategies, you should use the Description field to explain the signature. You may choose Clear if you wish to redo the signature.
Select Done once you end.
Step 5: When you see the signature show in Preview utilizing one of many above choices, you may then drag to maneuver it the place wanted within the doc. Again, you may drag a nook to resize your signature.
Next, it can save you, export, or share the signed PDF utilizing File within the menu bar.
When it’s essential signal a PDF doc for work, faculty, or enterprise, it takes only some minutes in Preview on Mac. For extra, take a look at learn how to print a PDF on Mac as nicely.
Editors’ Recommendations
[ad_2]