
[ad_1]
Knowing how you can arrange Wallet and Apple Pay on Mac is your first step to larger monetary effectivity. You can then select Apple Pay throughout checkout, enter your password or use Touch ID, and pace up your buying expertise.
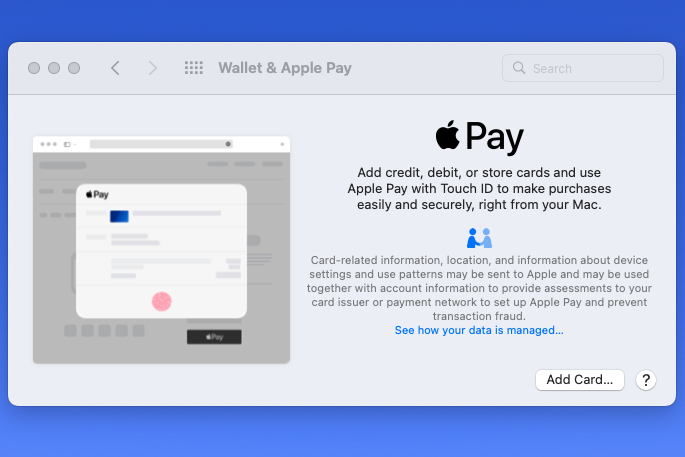
Set up Wallet and Apple Pay
You can arrange your Wallet utilizing the debit and bank cards you’ve added to the Wallet in your iPhone or iPad. If you don’t have these gadgets, you’ll be able to merely add playing cards and also you’re prepared to make use of Apple Pay.
Step 1: Open System Preferences utilizing the icon in your Dock or Apple icon within the menu bar.
Step 2: Choose Wallet & Apple Pay.
Step 3: When you initially choose this feature, you’ll see a setup display screen. Select Add card to get began and check in together with your Apple ID if prompted.
Moving ahead, you’ll merely see your Wallet the place you’ll be able to handle your fee strategies while you open Wallet & Apple Pay.
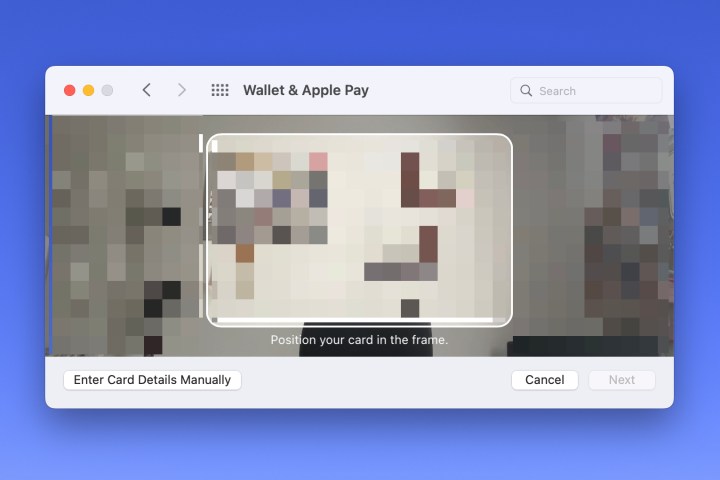
Step 4: If you don’t have playing cards within the Wallet in your different gadgets, choose Add card. Then, comply with the prompts to both maintain your card as much as your Mac digital camera or enter the knowledge manually.
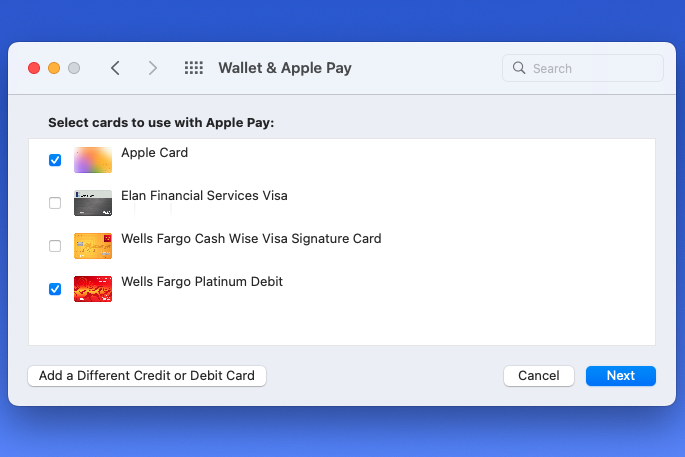
Step 5: If you do have playing cards within the Wallet in your iPhone or iPad, you’ll see these listed. Check the packing containers for these you need to use in your Mac and decide Next.
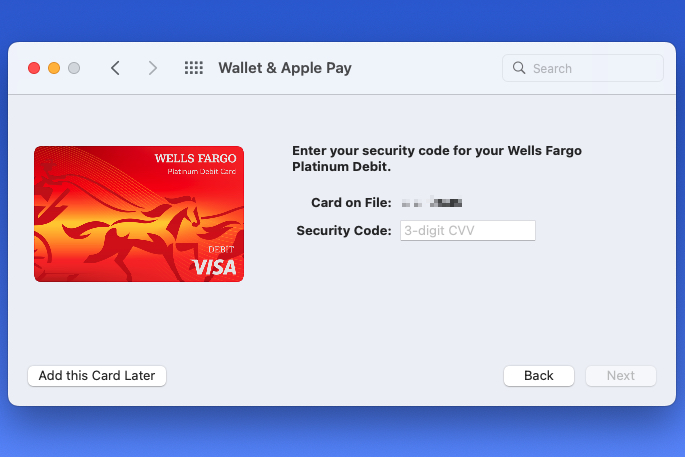
Step 6: Depending on the kind of card you are including, you might be requested to enter or affirm extra info. For instance, you might be prompted so as to add the CVV for a debit card.
After you present the main points, choose Next.
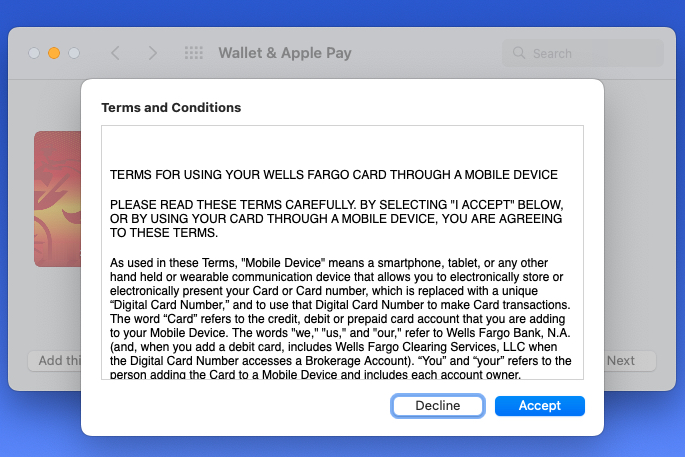
Step 7: Again, relying on the cardboard sort and corresponding financial institution, you might be requested to just accept the phrases and situations. If so, choose Accept to proceed after you overview the phrases.
Step 8: You’ll see a quick message on the backside of the window as your financial institution is contacted for approval to hook up with Apple Pay.
When full, choose Done and also you’re prepared to make use of Apple Pay.

Adjust your fee preferences
After you add or choose playing cards on your Wallet, you might need to overview the hooked up particulars on the display screen that shows.
Step 1: You’ll see your playing cards listed on the left with the default card on the high. To change the default, use the drop-down field on the backside of the window to choose the cardboard you need.
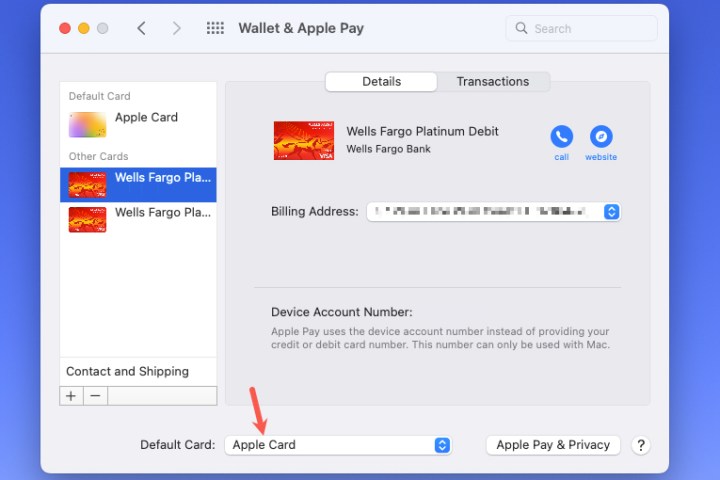
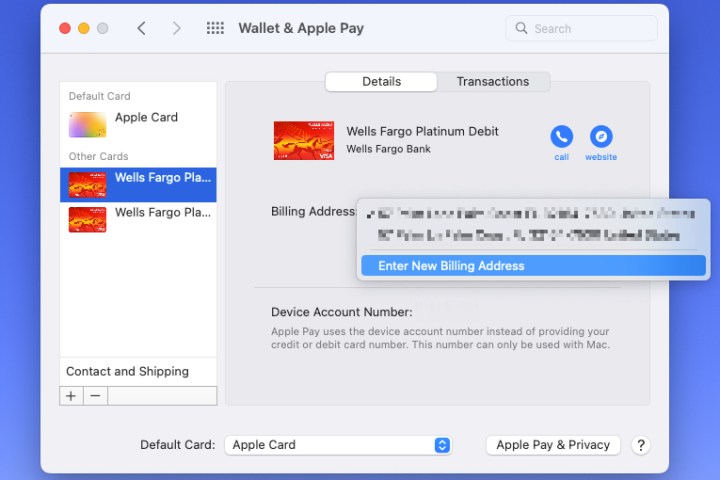
Step 2: You ought to see your billing handle listed for every card you choose on the left. If it is advisable to change this, choose the Billing handle drop-down menu to choose Enter new billing handle.
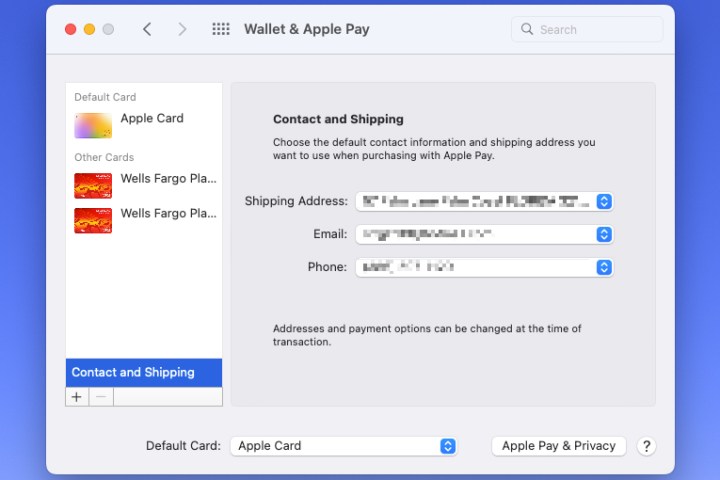
Step 3: You may also select your default billing and transport handle. Select Contact and transport on the backside of the cardboard checklist on the left. Then make any adjustments to your transport handle, e-mail handle, or telephone quantity on the appropriate.
By establishing Wallet and Apple Pay in your Mac, you can also make on-line purchases with out looking on your bodily pockets and fee playing cards. Simply choose the Apple Pay possibility, use Touch ID or enter your password, and also you’ll save a ton of time in the course of the checkout course of.
For extra recommendations on utilizing Apple Wallet, take a look at how you can add your driver’s license or how you can add a boarding move to Apple Wallet.
Editors’ Recommendations
[ad_2]